
Conditions and Settings for Auto Drive (Unrestricted)
In GTA VI, you can let the AI drive you to a marked destination while inside the cinematic camera.
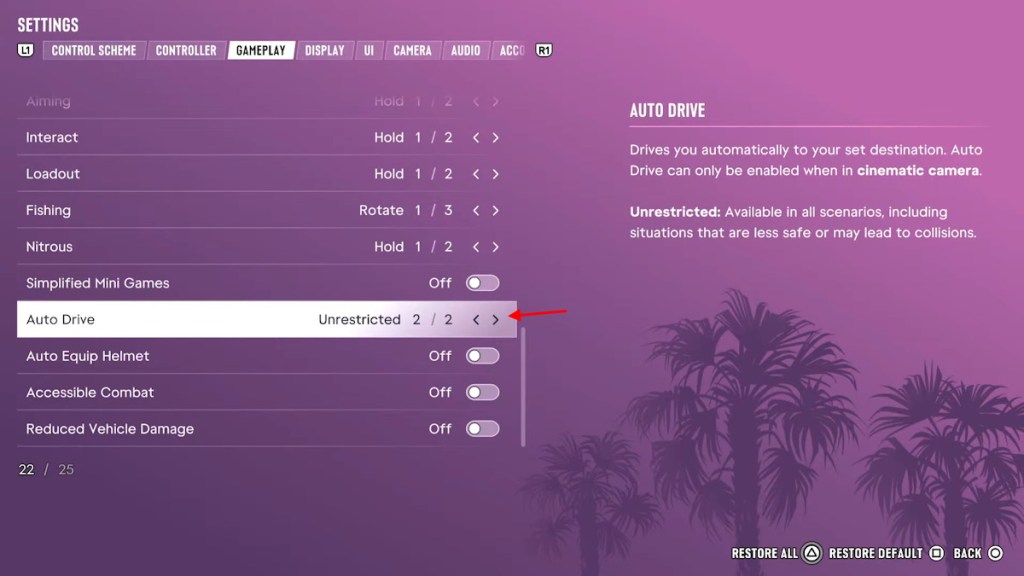
The settings screen captured by Beebom's Ishan Adhikary states that Auto Drive can only be enabled in the cinematic camera.
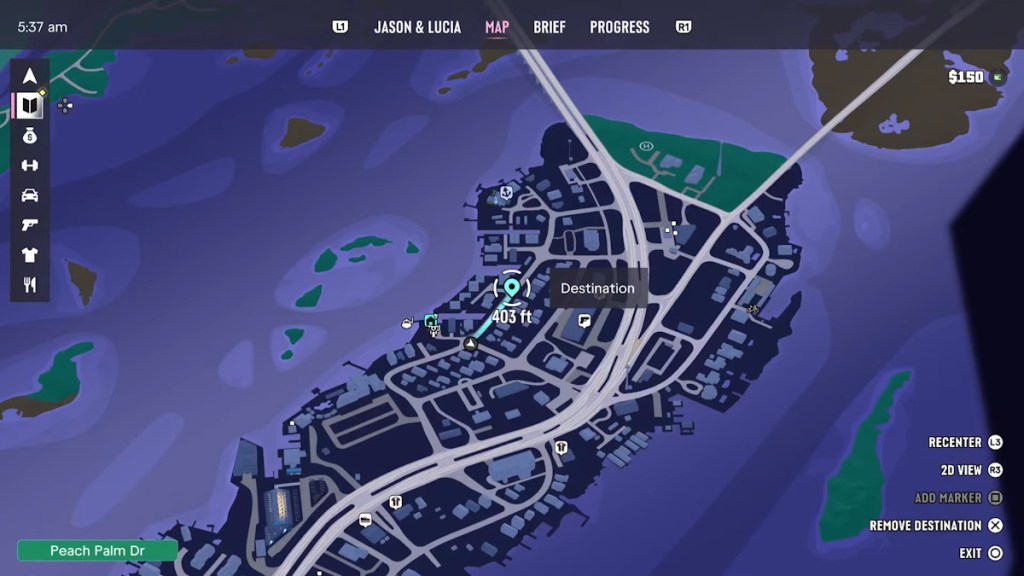
To use it, set a destination on the map, enter the cinematic camera, accelerate slightly, and hold Circle (PS5) or B (Xbox).
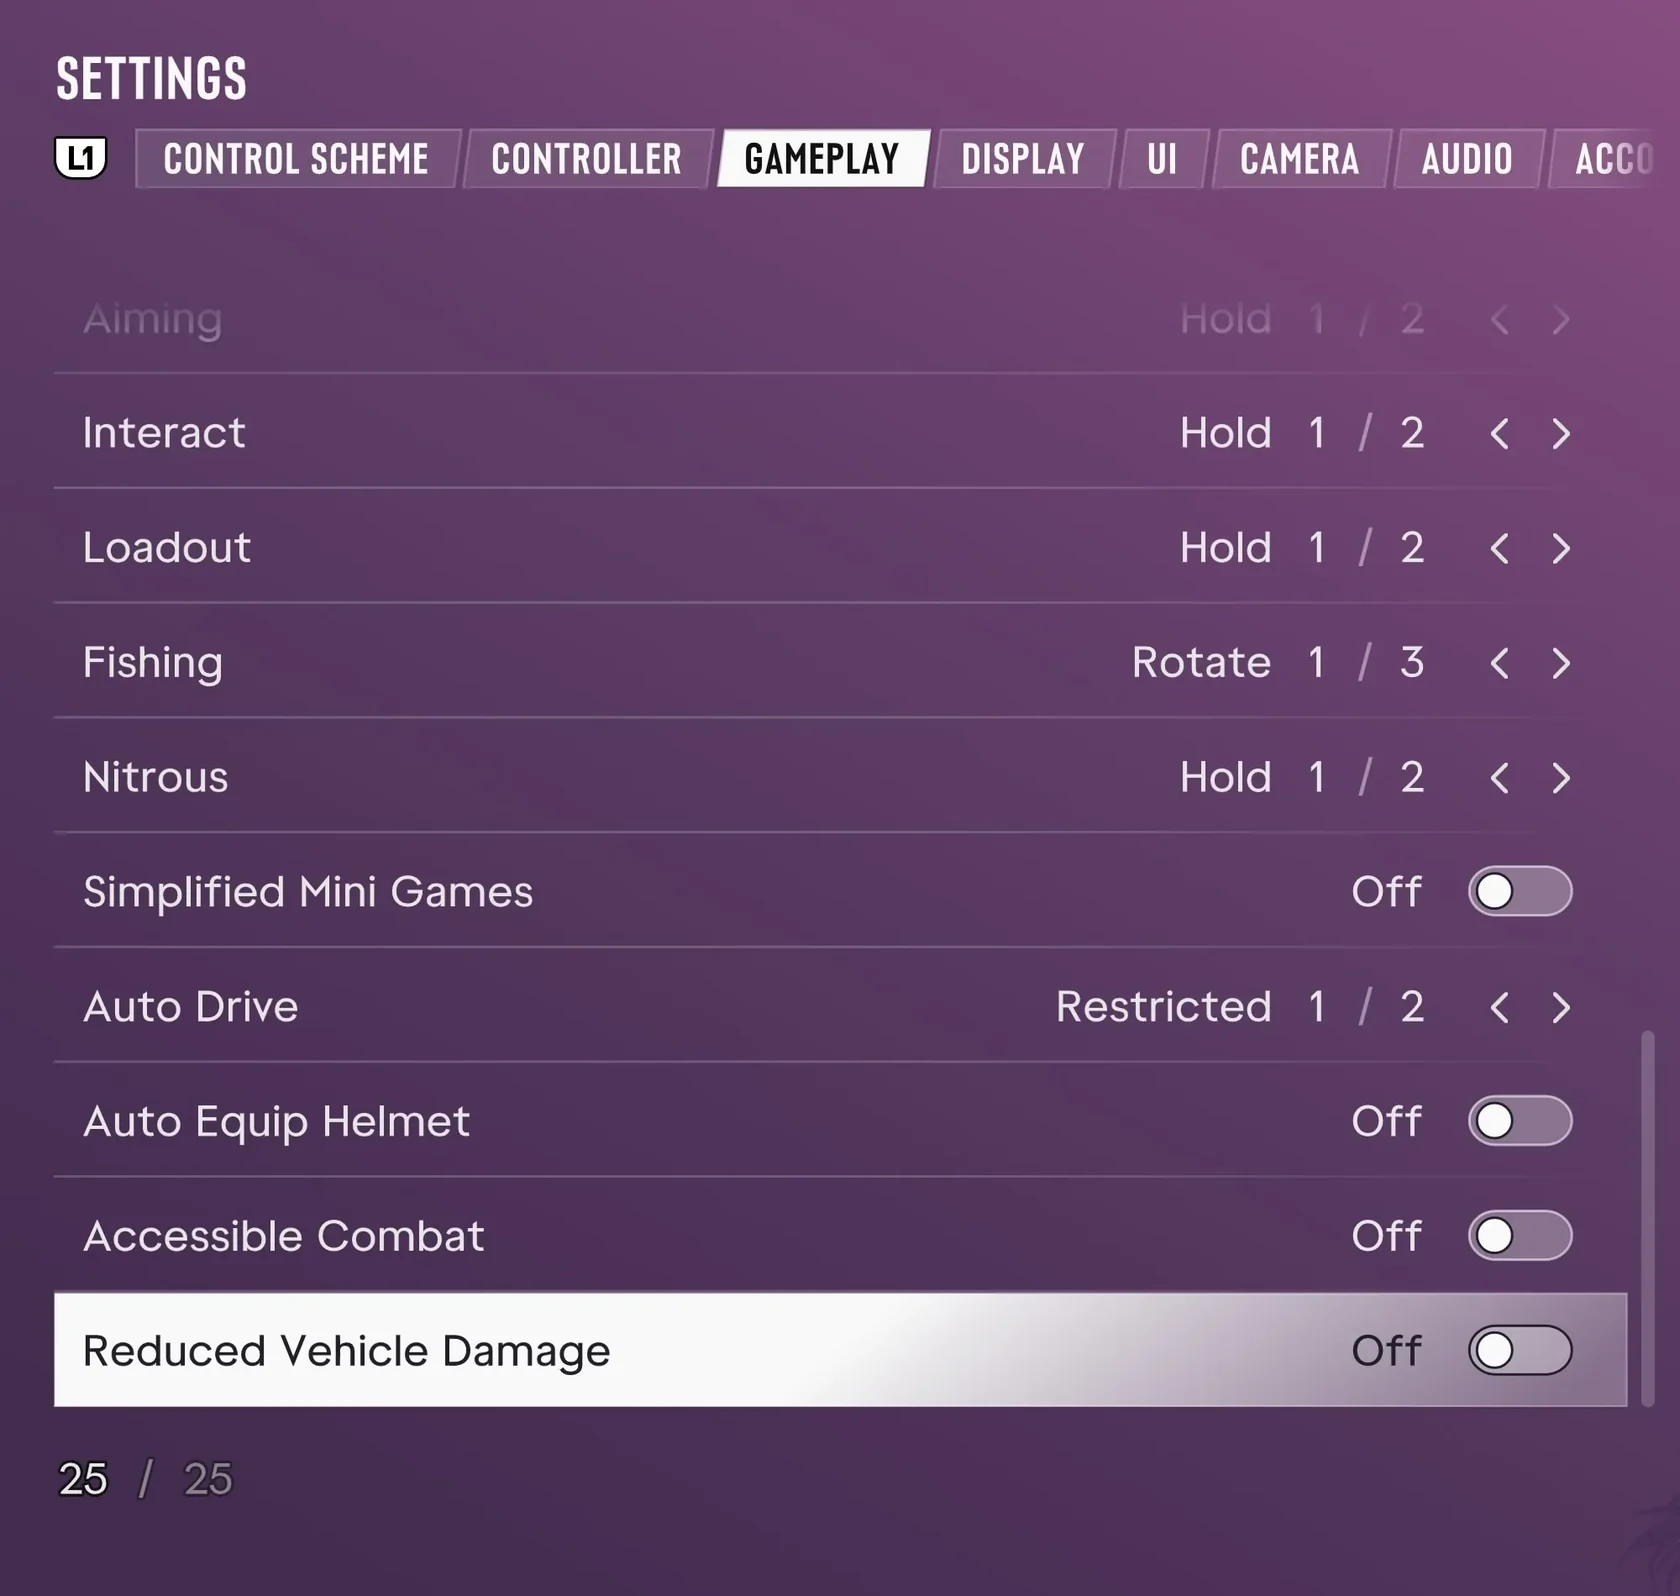
| Settings path | Settings > Gameplay > Auto Drive |
|---|---|
| Unrestricted (2/2) | Also covers situations that may lead to a collision |
| Allowed camera mode | Cinematic camera only (per Beebom) |
How to Let Your Companion Drive in GTA VI: Hold Right on the D-pad and Ride in the Passenger Seat
How to Enable Auto Drive in the Cinematic Camera
Accelerate slightly in the cinematic camera and hold Circle (PS5) or B (Xbox) to enable Auto Drive.
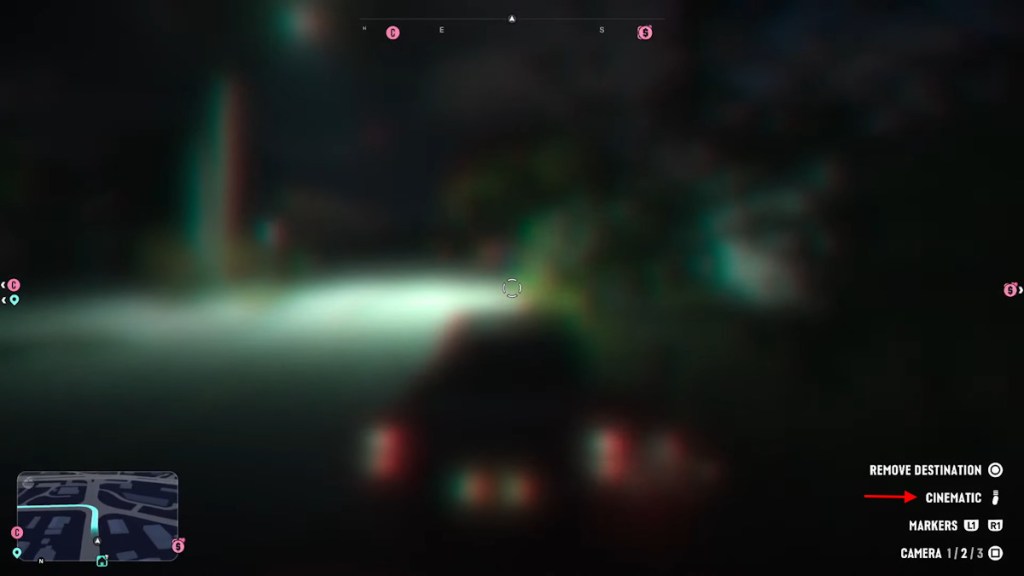
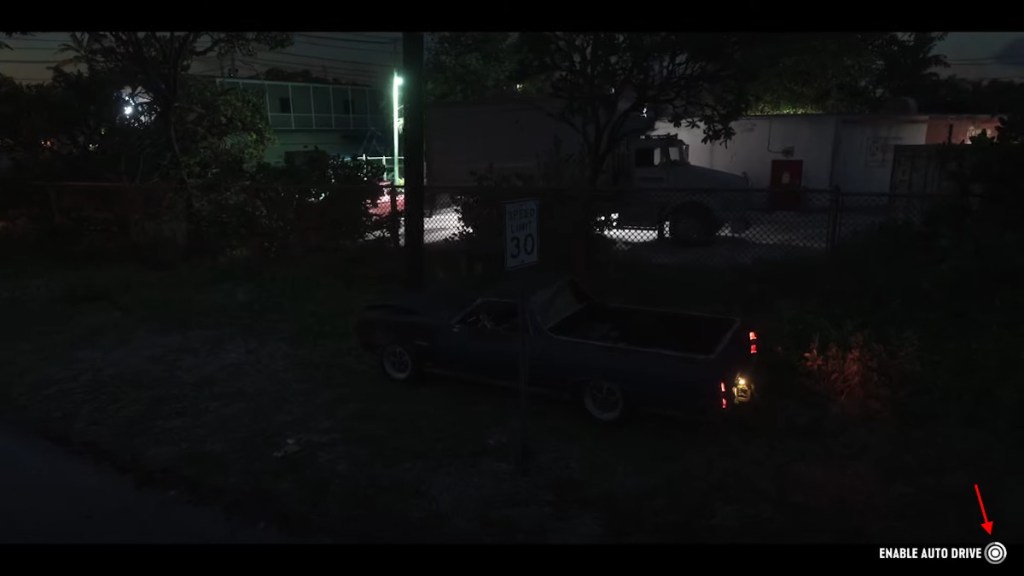
While holding D-pad Down, REMOVE DESTINATION and CINEMATIC appear at the bottom right. After switching to the cinematic camera and accelerating slightly, the ENABLE AUTO DRIVE prompt appears (Circle icon on PlayStation).
- To use Auto Drive even in situations that may lead to a collision, go to Settings > Gameplay > Auto Drive and choose Unrestricted.
- Open the map and place a destination marker so the light-blue route and Destination label appear.
- Press Triangle (PS5) or Y (Xbox) to enter a vehicle and start driving.
- Hold D-pad Down and press OPTIONS (PS5) or Menu (Xbox) to enter the cinematic camera.
- Press R2 (PS5) or RT (Xbox) to accelerate slightly, and check for ENABLE AUTO DRIVE at the bottom right.
- Hold Circle (PS5) or B (Xbox) to enable Auto Drive.
- Let the AI take control and drive you toward your marked destination.
How to Set a Waypoint Without Opening the Map in GTA VI on PS5
How to Change Speed (SPEED 1 / 2 / 3) and Exit Cinematic Mode
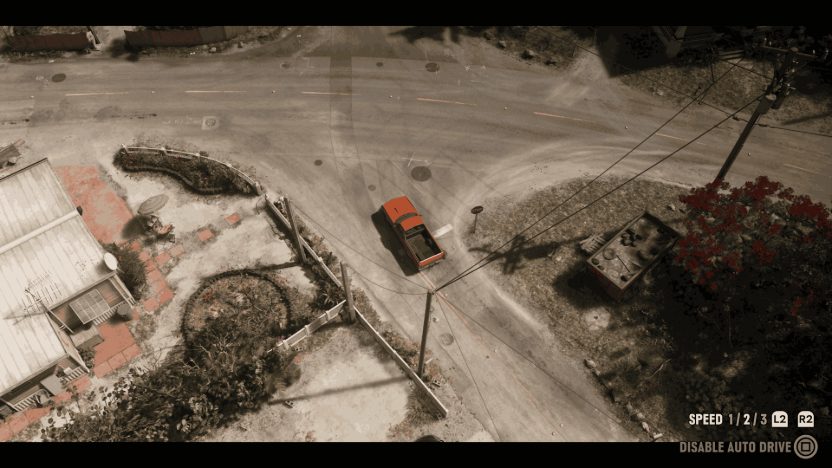
While Auto Drive is active, speed has three tiers, and according to GTABase's Alan Sahbegovic the default is 2. Speed changes are also listed in Beebom's controls table and on IGN Wiki.
In the PlayStation screenshot published by GTABase, SPEED 1 / 2 / 3 appears next to L2 and R2 prompts at the bottom right, and 2 is highlighted. DISABLE AUTO DRIVE appears beneath it.
The sources do not state whether 1 or 3 is the slower end, so change speed with the trigger inputs rather than by number.
| Lower speed one tier | L2 (PS5) / LT (Xbox) |
|---|---|
| Raise speed one tier | R2 (PS5) / RT (Xbox) |
| Exit cinematic mode | Hold D-pad Down |
What to Check When ENABLE AUTO DRIVE Is Missing or Greyed Out
If ENABLE AUTO DRIVE is greyed out, GTABase recommends driving onto a public road first.
If the prompt does not appear at all, confirm that a destination is set on the map and that you entered the cinematic camera by holding D-pad Down and pressing OPTIONS or Menu.
As shown in Beebom's settings screen, Auto Drive requires both a marked destination and the cinematic camera.
After switching to the cinematic camera, accelerate slightly with R2 or RT to bring up the ENABLE AUTO DRIVE prompt.
Unverified Platform Screens and UI Labels
The screenshots checked from Beebom and GTABase show the English UI with PlayStation controls as of November 21, 2026.
Xbox Series X|S inputs are based on Beebom's per-platform controls table, and the speed-change triggers are also confirmed in IGN Wiki's text.
Actual Xbox screens, Japanese UI menu names and speed labels, and regional or version differences are unverified.
The SPEED 2 default comes from GTABase's written explanation. The published still image alone only shows that 2 was selected when the screenshot was captured.
Where to Lower Cinematic Kill and Crash Frequency in GTA VI (PS5)